What is texture painting in Blender?
Texture painting in Blender is a powerful tool that allows artists to paint directly onto 3D models, bringing them to life with color and detail.
However, like any software, Blender can sometimes encounter issues that prevent texture painting from working as intended.
In this guide, we will explore common problems that users may face when texture painting in Blender and provide step-by-step troubleshooting solutions to help you get back on track.
If you are just getting started, you can check out my guide here
Understanding Texture Painting in Blender
Texture painting in Blender involves applying a 2D image, known as a texture, onto a 3D model's surface.
This process allows artists to add:
- color
- patterns
- and details to their models, creating realistic and visually appealing renders. I have written a quick guide on how to get started with texture painting if you need to know more.
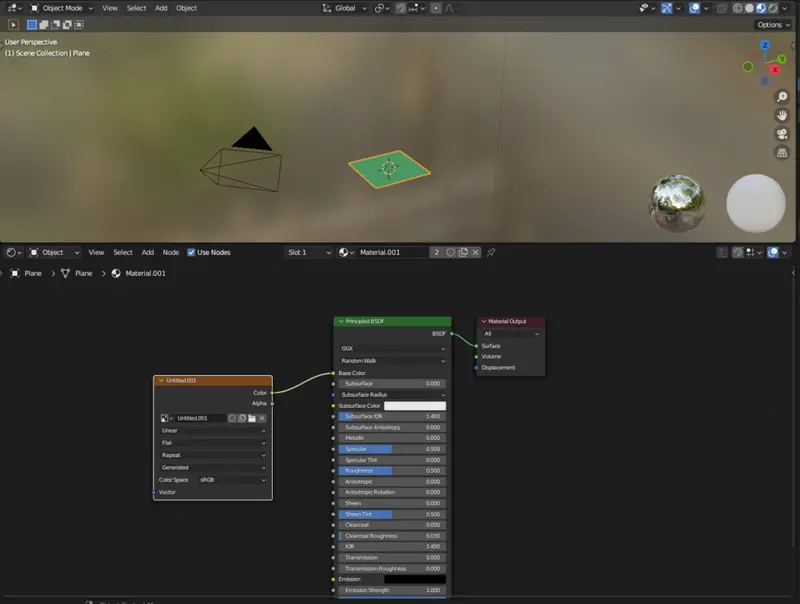 Example of setting up a basic material in Blender
Troubleshooting Common Texture Painting Issues
Now that we have a basic understanding of texture painting in Blender, let's explore some common issues that users may encounter and provide step-by-step troubleshooting solutions:
Issue 1: Texture painting mode is not active
If you're unable to paint on your model, the first thing to check is whether the texture painting mode is active. Follow these steps:
Enter Texture Paint mode: In the 3D viewport, select your model and navigate to the Properties panel, located on the right side of the screen. In the "Materials" section, click on the "Texture Paint" button to activate the texture painting mode.
Check the active texture: By default, Blender will access the first image texture in the material that it finds. If your object is pink it means that there is no texture currently available.
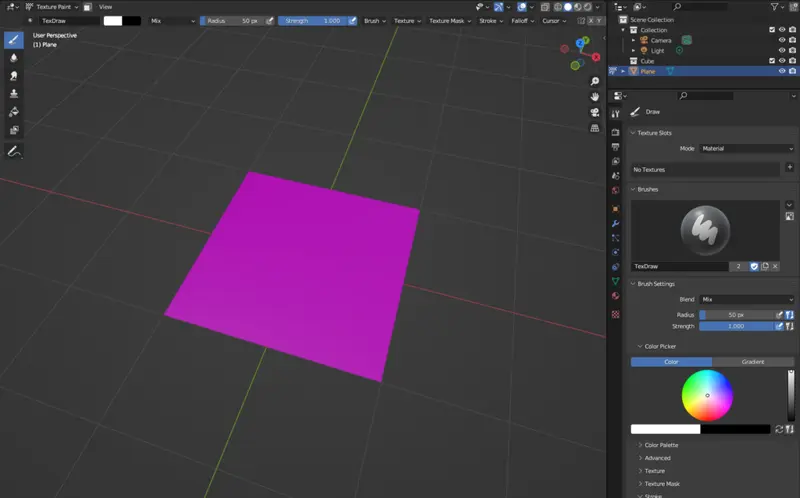 An example of an error in Blender, indicated by a pink plane
Create a new texture: You can create a new via the texture slots in the properties - or via the material editor (then making sure to select it in the texture slot)
Another common problem is that your image texture might not exist at the location specified, or it has been moved (If you are not using a relative file structure)
Issue 2: Brush strokes are not appearing
If you can't see the brush strokes on your model, follow these troubleshooting steps:
Check the brush settings: Make sure that the brush size, opacity, and hardness values are set to a visible range. If these values are too low, the brush strokes may be very faint or invisible.
 Example of the brush settings in the top-bar in Blender
Inspect the brush stroke method. Your method settings may have been changed. For example in the case of space - you want to ensure that the spacing between the samples are not too far (in most cases) otherwise it might appear that your brush is not doing anything. When in fact it is just waiting till enough space is available to place the next sample.
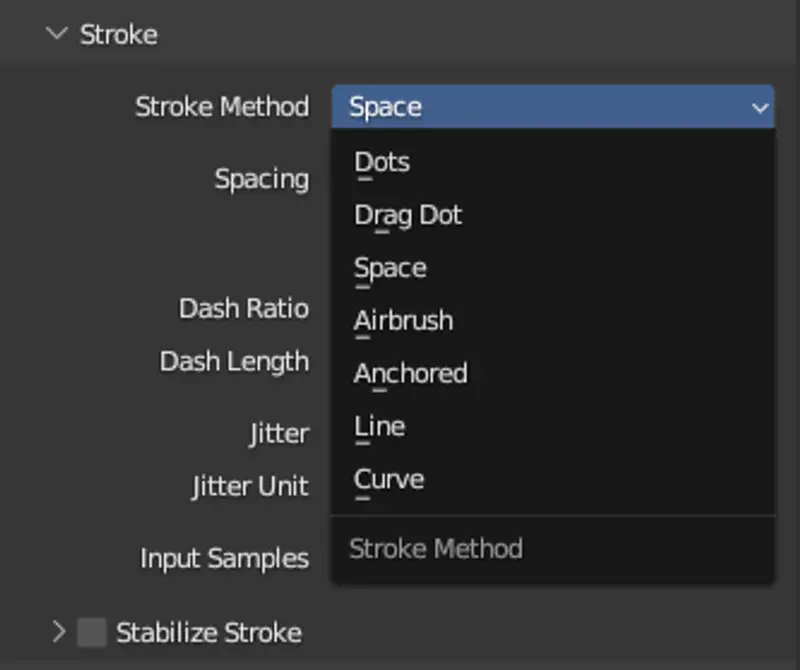 Example of selecting the stroke method in Blender Texture Painting
Are you using the right tool? Ensure that the tool that you have selected is the paint tool and not another tool, such as smear.
Issue 3: Painting is not visible after rendering
If your painted texture is not visible in the final render, consider the following solutions:
- Check the material setup: Ensure that the material assigned to your model is set up to use the painted texture. In the "Shader editor,"make sure that the "Image Texture" node is connected to the appropriate shader node. Additionally, confirm that the node's "Color" output is connected to the "Base Color" input of the shader node.
- Verify the rendering engine: Some rendering engines, such as Blender's Cycles, require specific material configurations to display texture painting results. If you're using Cycles, make sure that the "Viewport Shading" is set to "Rendered" mode and that the necessary nodes are correctly configured.
Issue 4: Painted texture appears distorted or stretched
If your texture appears distorted or stretched on the model's surface, you may need to adjust the UV mapping. Follow these steps:
- Enter Edit mode: Select your model and switch to Edit mode. You can do this by pressing the "Tab" key or selecting "Edit" from the Mode dropdown menu located at the top of the 3D viewport.
- Inspect the UV layout: With the model in Edit mode, make sure that the UV islands are not overlapping, stretched, or distorted. Use the UV editor to adjust and arrange the UV islands, so each island corresponds accurately to the model's surface.
- Revisit the texture painting: After rearranging the UV islands, return to Texture Paint mode and verify if the painted texture appears correctly on the model. If not, go back to Edit mode and make further adjustments until the desired result is achieved.
It should be noted that you should only change the UV’s if you are 100% sure that they are the culprit and that you only require small changes.
If you will need to redo the UV’s you will need to rebake the texture - And if that texture has a problem such as distortions or stretches - they will carry over.
That is why it is very important to test your UV’s with either a color grid or a uv grid.
Issue 5: Everything is one color and not updating
If your texture appears to be one solid color that is not pink, remembering that pink is a sign that there is no texture. (usually black) Usually what is happening is the UV has been reset, zeroed or not created.
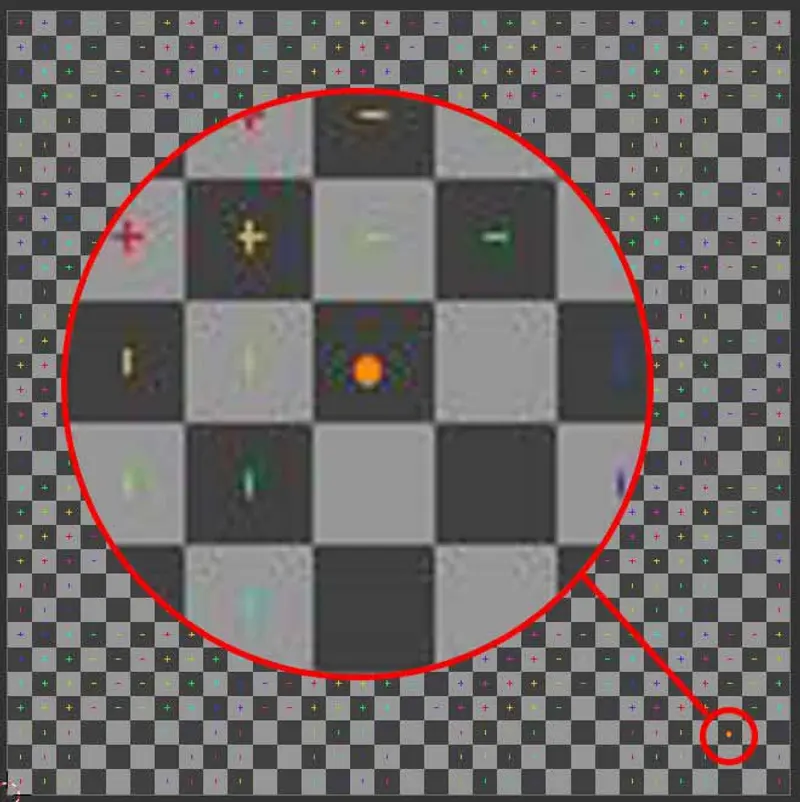 Example of a UV coordinate that has been zeroed in Blender
It will look something like this. There will be a little orange(or black if not selected) dot that represent your UV’s… I like to called this a UV Black Hole.
- Navigate to your UV editing workspace
- Select your model and enter edit mode. Then select everything by pressing the “a” key. Or choosing select -> select all.
- You should see your UV map in the left window. If you do not, check all the corners of the image bounds. If you see a single point that is highlighted orange. It means that all the UV’s are converging on a single point - which is why it is only showing one color!
- Recalculate your UV by pressing “U” then unwrap - There are a number of different ways to unwrap your UV - but this is the most basic.
Wrap up
Texture painting in Blender can add depth and realism to your 3D models, but it's not immune to issues that may hinder its functionality.
By following the troubleshooting steps outlined in this guide, you can address common problems and ensure that texture painting works as intended. Remember to check the texture painting mode, brush settings, material setup, and UV mapping to pinpoint the root cause of the issue.
With patience and practice, you will be able to unleash your creativity and produce stunning texture-painted renders in Blender.
If after all of this you are still struggling with this - it may be prudent to get professional help. Consider contacting a consultant or teacher.
Polyfable
Bring your stories to life
Are you tired of scrolling youtube?
Trying to learn how to tell your story?
Become a member and get access to our amazing courses and levels!
Join Now
