Understanding the Normal Edit Modifier
The Normal Edit modifier in Blender is a modifier that is designed to affect or generate custom normals, which are vectors perpendicular to the surface of a 3D model.
These normals play a crucial role in determining how light interacts with the mode.
Normals affect shading, reflections, and overall visual appearance. The Normal Edit modifier allows artists to exert precise control over the orientation of these normals, ensuring better control over lighting and shading.
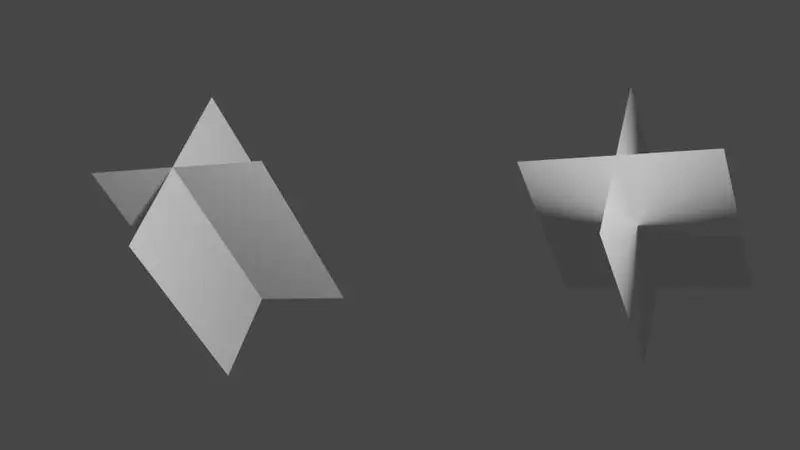
Here is a really basic example of a "smooth" shaded object on the left and a Normal Edit Modifier on the right.
As you can see the Normal Edit modifier is fantastic for creating simple, smooth normals on planar shapes. So it is perfect for game engine foliage.
Enabling Custom Normals
Before diving into the Normal Edit modifier, it's essential to enable custom normals in Blender. To do this, simply go to the "Properties" panel, then navigate to "Object Data" and select "Normals." Enable the "Auto Smooth" option to activate custom normals for your object.
Alternatively with newer versions of Blender, you can right click while you have you object selected and then choose Auto-Smooth from the object context drop-down.
Options in the Normal Edit Modifier
The Normal Edit modifier offers two primary modes: Radial and Directional, each serving different purposes:
Radial Mode
Additionally, in Radial mode, you can use the "Offset" option to give the modified object's origin an offset before generating the normals.
Directional Mode
In the Directional mode, all normals converge towards a given target object's origin.
You can choose to make the normals parallel to the line between both objects' origins instead of converging towards the target's origin.
Mix
Mixing Normals and Controlling Factors
The Normal Edit modifier allows you to control how the newly generated normals interact with the existing ones using the "Mix" options:
Mix Factor and Vertex Group
Adjust the "Mix Factor" to determine how much of the generated normals blend with the existing ones.
Utilize a "Vertex Group" to have per-item fine control over the mix factor, allowing you to define specific regions with varying normal blending.
Max Angle and Lock Polygon Normals
The "Max Angle" option prevents new generated normals from having an angle with the original normals above the specified threshold. This helps avoid extreme changes that may cause shading artifacts.
Enabling the "Lock Polygon Normals" feature prevents flipping of polygons that no longer match their custom normals, avoiding potential shading issues.
Practical Usage Scenarios
The Normal Edit modifier in Blender offers a wide range of applications, including:
Creating Realistic Foliage: Use the Radial mode to generate accurate normals for low-poly tree foliage, enhancing the visual appeal in game environments.
Fixing Shading for Toon-like Rendering: The modifier allows you to manipulate normals to achieve specific shading effects, ideal for creating a toon-like rendering style.
Architectural Visualization: Ensure precise shading and lighting in architectural models to create stunning visualizations for presentations and projects.
Polyfable
Bring your stories to life
Are you tired of scrolling youtube?
Trying to learn how to tell your story?
Become a member and get access to our amazing courses and levels!
Join NowConclusion
Mastering the Normal Edit modifier in Blender opens up a world of possibilities for 3D artists, game developers, and architectural designers.
Custom normals and Radial/Directional modes can improve the look of "leafy" trees in game engines.
Additionally, with control over mixing factors and options, you can fine-tune the normals to meet your specific artistic vision. Whether you're working on game assets or architectural projects, the Normal Edit modifier is an indispensable tool for creating stunning and lifelike 3D scenes. So, unleash your creativity and take advantage of this powerful feature in Blender to bring your ideas to life in the digital realm.